Saturday, February 28, 2015

Murphy's Law

Murphy's Law states that "Anything that can go wrong will go wrong." On a model railroad, this is never truer than when you try to show your layout off to others. And that's exactly what happened tonight. I had a few guys over to run trains. I wouldn't call it a full-fledged operating session but I had told them to "Bring something to run." My friends happily obliged supplying some really cool stuff. Unfortunately though the layout didn't exactly perform well.

The first problem was yours truly completely forgot to  line some of the yard turnouts back to the main line and a couple of trains ended up where they shouldn't have. I've got nobody to blame but myself for that one. But being me, I manged to make the mistake, realize it and yet make it again!

The next issue the cropped up was us overloading my MRC throttle pack. We were running several long trains with multiple-unit consists. I think that was just too much as we kept tripping the breaker. So I had to send one train into the yard.

Now, one of my friends brought over an Athearn Challenger lettered for the Clinchfield. I was excited to see it run. Now my friend is a DCC guy but my layout is stuck in the stone age with DC cab control. Well, said challenger has a dual mode decoder which, in theory should have run just fine on my layout. But with the sound, it wouldn't budge unless it was given full throttle. Not only that, but it consistently hopped the rails when traversing the Peco crossovers at Johnstown. Oh well, it still holds the distinction of being the largest locomotive to ever run on the Pittsburgh Division. Other than that, there was a whole lot of stalling, breakaways and derailments.

Anyway, issues aside, a good time was still had by all.
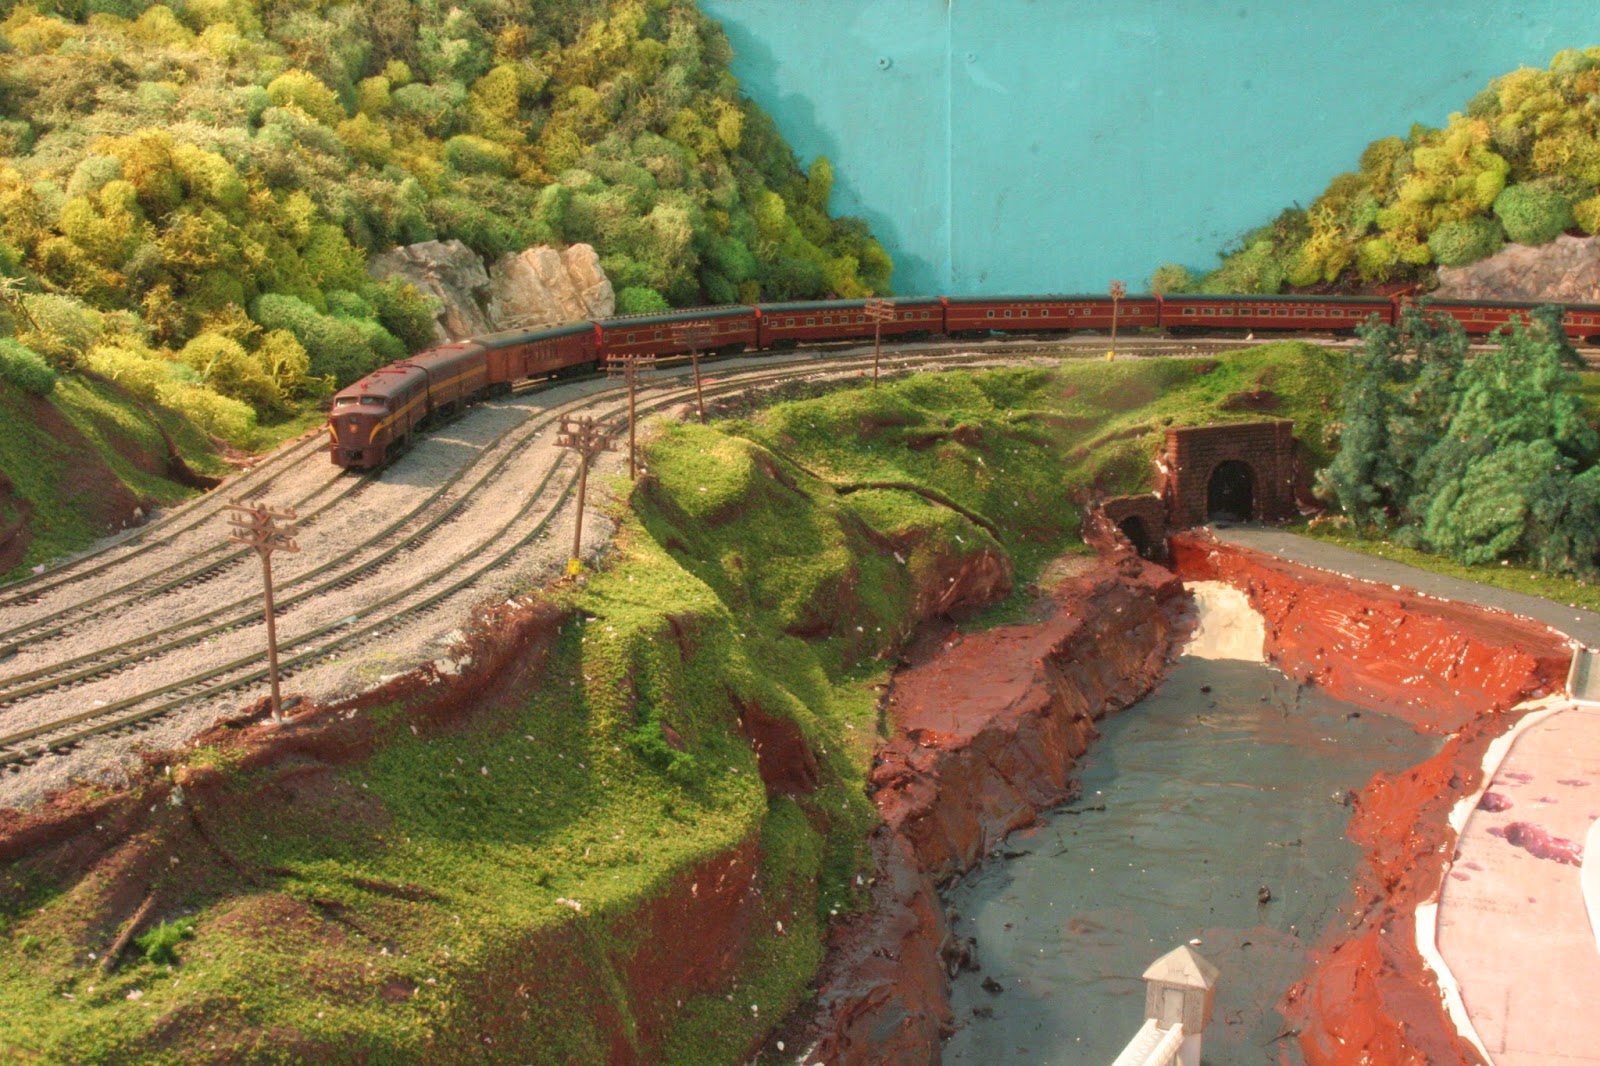
Atlantic Coast Line FTs stetching their legs. This is their first run on this layout.

N&W 611 & LIRR C420

Vising GP18 meets a PRR GP7 and GP9
Visiting C40-8

Visiting Southern GP18

Wednesday, February 18, 2015

Horseshoe Curve Update


I haven't done too terribly much on the layout these past few days. I've been busy with schoolwork and projects around the house, so spare time has been fleeting. Also, I just haven't felt up to tackling the next major project, which is the ridge of hills near Kittanning Point and the lower lake bed. Plaster is a messy pain in the ass and sculpting styrofoam without a hot knife is, well, a pain in the ass. The one thing I have manged to get done is the upper lake. The water is in and I'm quite pleased with how it turned out. The intake structure turned out nicely too.

Another thing that's been on my mind is where to go after the curve is finished. My original plan was to simply follow the tracks and move into Gallitzin next. But now I'm rethinking that. Part of me kind of wants to do some scenery on the western end of the layout, chiefly from the edge of Johnstown up to Cassandra. One thing I am certain of is leaving the urban areas of Altoona and Johnstown for last.

Sunday, February 15, 2015

One Layout, Three, wait..make that Four Eras


The real Pennsylvania Railroad main line that I'm modeling has changed hands a number of times over the past 47 years. As you all know I have multiples eras represented on this layout. I'm sure you've noticed an era is missing, Penn Central. Well that all changed this weekend. 

Without getting into too much history, the Penn Central Transportation company existed from 1968 to 1976. It was formed out of the merger of the Pennsy and its arch rival the New York Central. The New Haven was added in 1969 at the insistence of the ICC. The merger was not successful and the company was bankrupt by 1970 and merged into Conrail along with seven other bankrupt northeastern railroads.

At any rate I had a Life Like GP20 and an Atlas/Kato GP30 painted and lettered for my old Cherokee Foothills railroad. These were among the last engines still wearing CFRR paint. I been wondering what to do with them for some time and decided to paint them up for Penn Central.

The paint job was each, Floquil Engine Black from stem stern followed by Microscale decals. I don;t know if the decals were old or just a bad batch but it was a knock-down drag-out fight to get them applied. They needed to soak far  longer than the instructions called for and broke apart during application.But all in all I think the equipment turned out nicely.


In other news, I also made some more progress at the curve. The reservoir's intake structure is painted and installed. Glenwhite Road is paved and painted up to the bottom of the lake and the water is coming along nicely.


Thursday, February 12, 2015

Starting the Final Push at Horseshoe Curve.


I'm steadily approaching the finish line at Horseshoe Curve. During the past week, I've been focusing my attention to the valley floor. The major project here is the reservoir. It's a very prominent feature of the area. The reservoir is formed by Glenwhite Run and Kittanning Run. The main challenge here was get the needed depth of the lake bed. I didn't want to hack at the foam and have an uneven surface to deal with. My brilliant solution was to brush some acetone onto the foam, literally melting it. Well, aside from giving off some nasty fumes, this also left an uneven surface.

I ultimately ended up cutting through the foam all the way down to the plywood and ripping it out. I then used plaster of Paris to back fill the hole and attain the desired depth. I sculpted the sloping sides out of patching plaster.

Tonight's project was to paint the lake bed and surrounding terrain. I started out where each run drains into the lake. In real life both runs flow through stone-lines channels. Kittanning run actually flows alongside the reservoir rather than into it, however, as previously mentioned on this blog, I didn't have room to duplicate the particular feature. Anyway, I used Woodland Scenics "Concrete" pigment to paint the areas up to resemble spillways.

On my last layout, I'd used various shades of WS pigments for my lake bed. This time I tried something different. In an issue of Model Railroader, I saw a river that had been done by using gloss medium over a black surface. I decided to take some blue poster paint and mix in black until I got the shade you see in the above photo.

The banks and the surrounding areas were painted raw umber. The next step will be turf. I also started building a small intake structure out of Plastruct styrene strips. More on that once it's finished.

Tuesday, February 10, 2015

More Weathering

Got a couple more freight cars weathered and ready to go. Used the usual procedure so nothing special to report here. Still have a few more to go.

Saturday, February 7, 2015

Line Poles are In


I got the remaining line poles installed around Horseshoe Curve and up to the eastern portals of the Gallitzin Tunnels. The poles themselves are from Model Power and came with building kits. Before the poles got anywhere near my layout, they were painted roof brown and sprayed with Dulcote. I removed the big ugly base from each pole, then poked a hole in the scenery, inserted to pole and added a drop or two of Elmer's glue. The next step will be the actual lines.

Tuesday, February 3, 2015

Turf and Trees by the Tunnels


As you can see from the above photo, I've covered most of the new scenery with Woodland Scenics blended Turf. As usual, I started with a green blend, then added some yellow to break up the golf course look. I topped it off with some course turf to simulate underbrush.

Once I was done with the turf, I started planting goldenrod trees. I ran out of them in short order and need to do another batch.

Monday, February 2, 2015

Weathering Rolling Stock and Painting the Earthworks


I managed to get some of the freight cars I bought at the train show weathered yesterday. As usual I went with chalks. I think the cars tuned out rather nicely.


While I was at it, I went ahead and painted the recently-constructed mountains. Just painting all those white masses brown really makes a huge difference. I can't wait to get on with turf and trees.

After this all that remains is some more hillsides near Kittanning Point, pole lines and wire (yuck), roads and the lake in the middle of the curve. With that, all scenery between Altoona and the east portals of the tunnels will be done. From there, I hope to finish up Altoona proper and then move into Gallitzin.