
Garden Railway 1998 - 2007:

I grew up in a very small house with no basement, which made having a layout a bit of a non starter. Not to say we didn't try. But I had to face the fact that we'd never have room for anything more than a 4x8 and even that took up too much space. But the house did have a decent sized back yard and I had a plot where I'd grown a vegetable garden. With the necessary approval from my parents, I laid a simple loop of Code 332 Brass Track made by Aristocraft.
Truth be told, the experience was kind of frustrating at the beginning. I had very little money, and very little talent in the scratch building department to make up for it. I would thumb through issues of Garden Railways magazine and then get super-dejected that mine looked nowhere near as good.
Also, my motive power was definitely lacking. I had a pair of battery-power toy locomotives and the aforementioned Bachmann 4-6-0. The former where quite beat up and at the end of their useful lives and the latter was never a great runner to begin with. I would look at the ads in GR and lust over the higher-quality diesels that were completely out of my reach. I spent the entire summer of 1998 mowing lawns to buy my first diesel, an Aristocraft Alco RS3.

So I had to widen all my curves to five feet. That's when the idea of expansion popped into my head. I built a second loop inside the original and extended both into the plot beside the railroad, nearly doubling the run! During this time I also acquired two more diesels, a 20-ton switcher and an EMD NW2, both from USA trains. But, I was an idiot and laid the two tracks to close to each other! Trains crashing into each other on curves became a regular occurrence, resulting in a whole lot of damaged rolling stock.
The next season found me inserting spacers into the outside loop to push the tracks further apart. This solved the problem. This was around 2000 or so and I also got my first part-time job and found myself with a lot more money at my disposal. After I got my first paycheck, I looked at the locomotives in Garden Railways and this time, instead of dismay, it was "Hey! I can afford this!" So I started sinking some pretty serious dough into motive power and rolling stock. I also embarked on the most ambitious expansion yet.
In the summer of 2000, the outside loop was extended along the back fence for nearly the length of yard. The railway took on a completely different feel. The trains now felt like they were going somewhere instead of just around and around. The realism factor increased exponentially.

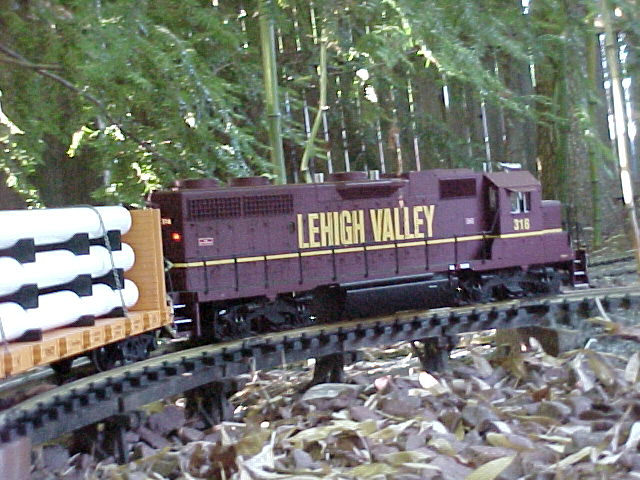
The railroad was a short line running from a connection with Norfolk Southern, nee-Conrail nee-nee-Lehigh Valley in Pennsylvania and running north to Springfield, NY. The line was a former Lehigh Valley branch that had been spun off by Conrail and as such ran a bunch of ex-Conrail power. The railroad operated freights to serve a few industries and a passenger service to benefit area tourism.
As the years went on, I transitioned from high school to college to 20-something starting a career. But the railroad remained. I added buildings and plantings and I thought I had it looking pretty good at the time.
But the winds of change were blowing. In 2006, my father retired after 30 years as a high school science teacher and in 2007, housing prices were starting to decline, hinting at what was to come in 2008. My parents had long fantasized about moving to Hilton Head and decided to get while the getting was good. A "for sale sign" appeared on the front lawn and that meant it was the end of line.
In August of 2007, the house sold and the railway was removed after nine mostly fun-filled years. I ran a ceremonial last train with my NW2 having head-end duties and a USA Trains wooden caboose bringing up the markers.

I was a novice when I built this railways and as such I made a lot of mistakes, such as using brass track, sharp curves and steep grades. Sometimes the railroad would run great, other times it fought me at every turn until I just gave up. So I plan to apply the lessons I learned all those years ago to the new railroad. To whit:
-No sharp curves or steep grades, they're a recipe for trouble.
-No brass track. It's pain to keep it clean and running properly. Next time it's nickle silver all the way and a more to scale rail code.
-Bigger does not necessarily mean better. On the old railroad, there were times, especially in the later years, when time spent on maintenance outstripped time spent enjoying.
-Pick one standard coupler. G Scale manufacturers all have their own proprietary couplers that work together only moderately well. I plan on switching to Kadees next time.
So that's the story. Here's some photos:


No comments:
Post a Comment