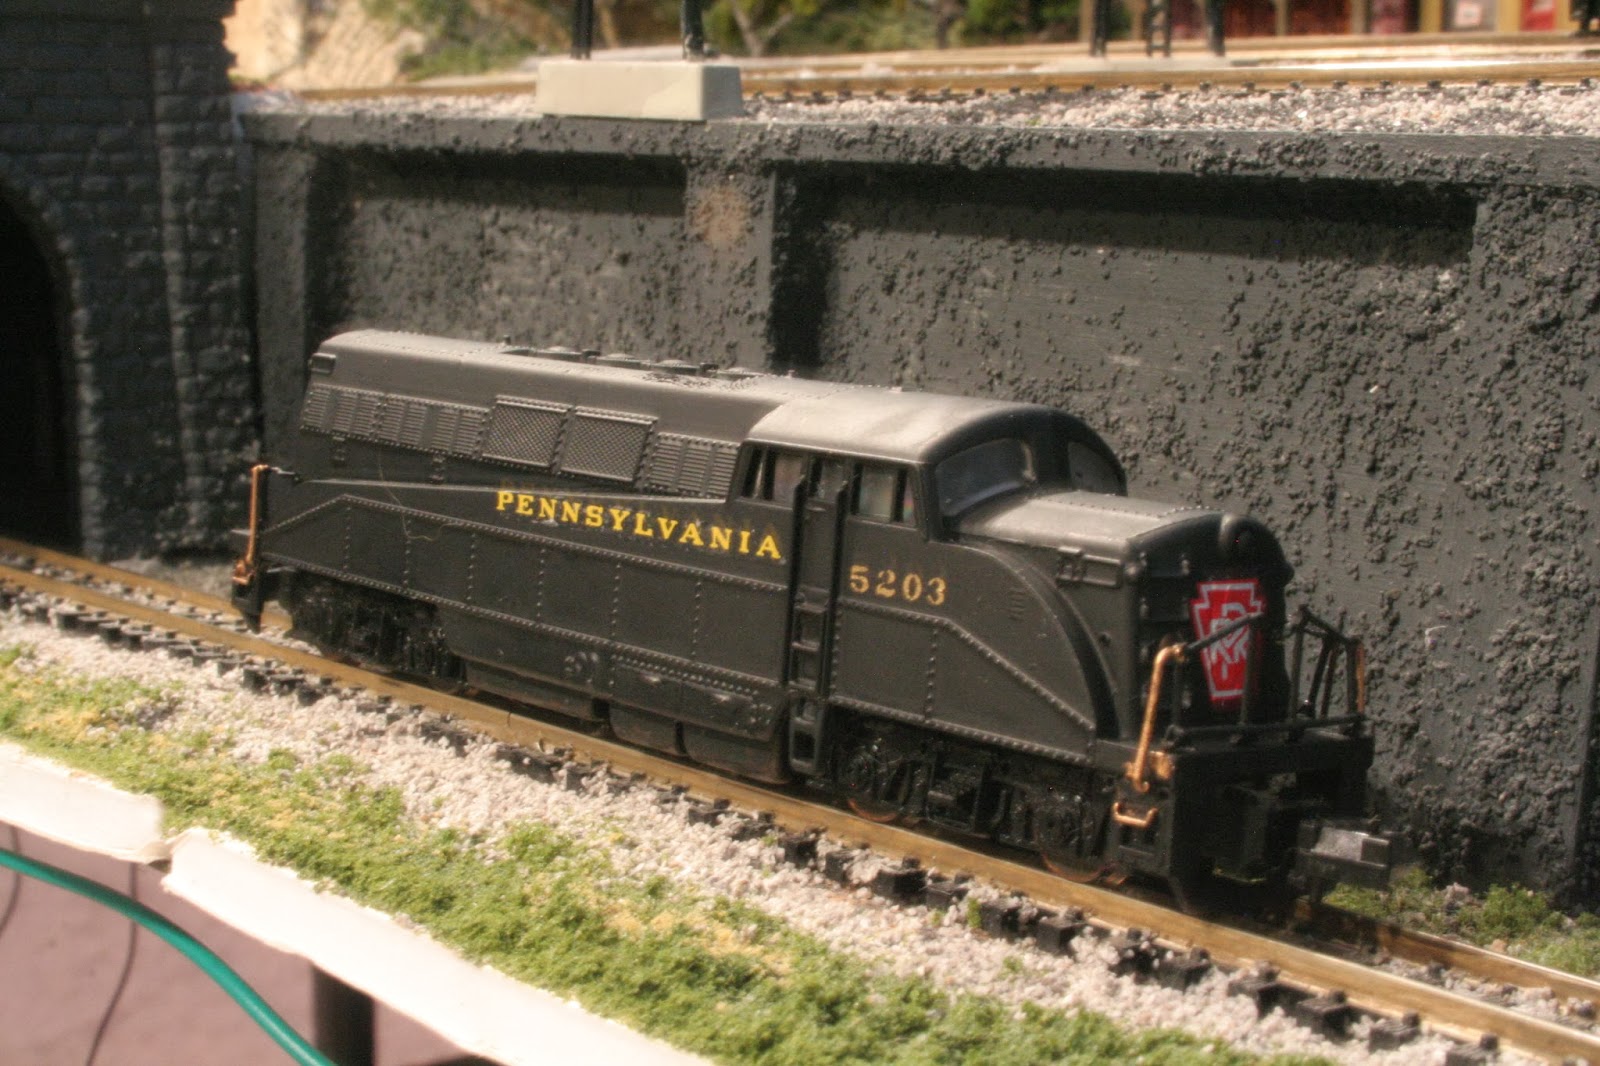
If you thought my last paint job got the rivet counters' shorts in a knot, this one will have them foaming at the mouth and going into palpitations. The Pennsy at least owned Alco FAs. The same cannot be said for the EMD BL2. But come on, it was only $20 at the local hobby shop.
Anyway, when I got the engine, it was unpainted black plastic. I gave it a quick coat of Floquil "PRR Brunswick Green" applied the decals (Microscale for the lettering and keystones, Woodland Scenics for the numbers), and painted the ends of the handrails Floquil "Bright Gold."
I have a few more motive power projects waiting in the wings. But as soon as turkey day passes, it's back to benchwork.
Monday, November 25, 2013
Sunday, November 24, 2013
Meanwhile, Back at the Paint Shop...
With the holidays rapidly approaching, work on the layout is on hiatus for now. With that being the case, I've turned may attention back to painting locomotives.
I spent the better part of two weeks on re-painting and decaling this set of Lifelike Alco FA-1s. I started out by stripping off the the original paint and weathering with denatured alcohol. With the factory paint removed, I repainted the unit with Floquil "Tuscan Red." I know, the Pennsy never had a Tuscan red FA, but I thought it would look cool, so I went ahead with it.
I painted the truck side frames and fuel tank Floquil "Grimy Black." I also painted the back of the power pickups Floquil "Engine Black" to conceal their appearance.
The decals are from Microscale with the exception of the numbers. Those are Woodland Scenics dry transfers. Let me tell you, those stripe decals are a huge pain-in-the-ass to deal with. They're almost impossible to get straight. In fact, up close, this engine looks like it was painted by a bunch of drunks!
I finished things up with some Dulcote to seal the decals. The B Unit is still a work in progress, but its the same basic procedure there.
So all in all, not a bad project but definitly not my best work either.
I spent the better part of two weeks on re-painting and decaling this set of Lifelike Alco FA-1s. I started out by stripping off the the original paint and weathering with denatured alcohol. With the factory paint removed, I repainted the unit with Floquil "Tuscan Red." I know, the Pennsy never had a Tuscan red FA, but I thought it would look cool, so I went ahead with it.
I painted the truck side frames and fuel tank Floquil "Grimy Black." I also painted the back of the power pickups Floquil "Engine Black" to conceal their appearance.
The decals are from Microscale with the exception of the numbers. Those are Woodland Scenics dry transfers. Let me tell you, those stripe decals are a huge pain-in-the-ass to deal with. They're almost impossible to get straight. In fact, up close, this engine looks like it was painted by a bunch of drunks!
I finished things up with some Dulcote to seal the decals. The B Unit is still a work in progress, but its the same basic procedure there.
So all in all, not a bad project but definitly not my best work either.
Thursday, October 31, 2013
Layout construction begins
Well, the layout is officially under construction. I spent the better part of last weekend painting the walls of my rec room sky blue. Today I built the first 4x8 section of benchwork. I used 2x2s for the legs and 1x3s for the horizontal boards. The whole thing will be topped off with a layer of pink Styrofoam insulation. The layout will ultimately be 48 inches high, which is about waist height for me.
In other new, I've reconsidered my choice of track. When I first started planning this layout, I was excited to use Atlas's newer and nicer-looking Code 55 track (I used the old Code 80 stuff on my last layout). However, I've changed my mind and decided to go with Peco Code 55 instead. For one thing Peco's c55 track is really code 80 rail that's sunk into the ties. This not only makes it more robust but also allows me to run old engines from the deep-flange days with no modification.
Another point in favor of Peco is the turnouts are reputed to be of higher quality than Atlas. Of course I'm going by what I read on forums and other blogs. But what I have read seems to be pretty consistent. Also Peco simply overs a greater variety of turnouts that will greatly simply my track plan.
Now Peco isn't perfect. Being a British product, it's model of British prototype track. As such the ties are too far apart to accurately represent American track. But you know what? That's really a minor quibble when get right down to it. I would much rather have a reliability than accuracy.
In other new, I've reconsidered my choice of track. When I first started planning this layout, I was excited to use Atlas's newer and nicer-looking Code 55 track (I used the old Code 80 stuff on my last layout). However, I've changed my mind and decided to go with Peco Code 55 instead. For one thing Peco's c55 track is really code 80 rail that's sunk into the ties. This not only makes it more robust but also allows me to run old engines from the deep-flange days with no modification.
Another point in favor of Peco is the turnouts are reputed to be of higher quality than Atlas. Of course I'm going by what I read on forums and other blogs. But what I have read seems to be pretty consistent. Also Peco simply overs a greater variety of turnouts that will greatly simply my track plan.
Now Peco isn't perfect. Being a British product, it's model of British prototype track. As such the ties are too far apart to accurately represent American track. But you know what? That's really a minor quibble when get right down to it. I would much rather have a reliability than accuracy.
Thursday, October 10, 2013
Finished Model Power's Victorian House Kit
Wow, this kit was really hard to to put together. And I don;t mean hard difficult; I mean hard tedious. Being a Model Power kit I was expecting it to be simple, four walls and roof. The walls, window trim, cornices, railings and what not were all separate pieces! It took me well over week to put this thing together.
For the most part I left the building in its stock colors except the roof, which got painted Floquil "Grimy Black," the Cornices that got painted "Depot Buff" and the widnow trim that got "Antique White."
I started out by taking the walls and slathering on gray poster paint and then wiping off most of it. This fills in the mortar lines and gives one a very realistic brick look. From there on it was basically follow the instructions.
I weathered the building with a coat of dark weather wash followed up by a coat of Dulcote.
For the most part I left the building in its stock colors except the roof, which got painted Floquil "Grimy Black," the Cornices that got painted "Depot Buff" and the widnow trim that got "Antique White."
I started out by taking the walls and slathering on gray poster paint and then wiping off most of it. This fills in the mortar lines and gives one a very realistic brick look. From there on it was basically follow the instructions.
I weathered the building with a coat of dark weather wash followed up by a coat of Dulcote.
Thursday, August 8, 2013
Expanding the Scope of the Layout
I've decided to try a represent multiple eras on the layout. While I am a huge Pennsy fan, the real Pennsylvania Railroad was long gone before I was even born. When I first went to Horseshoe Curve, Conrail was running the show. Since 1999, the line has been owned and operated by Norfolk Southern.
I Already have a fleet of modern-era freight cars and some Conrail and NS units. All I need to do is take the Pennsy stuff of the layout and put the Conrail/NS equipment on. I can even throw Amtrak into the mix if I so choose. Fellow Pennsy modeller Dave Vollmer does exactly that on his layout.
Okay, there is one little flaw in this plan. My trackplan calls for four tracks; Conrail removed one track in 1981. Oh well, when faced with choosing between accurate for the Pennsy or accurate for Conrail/NS, I choose Pennsy.
I've already started repainting some of my Cherokee Foothills locomotives into Conrail blue. I will post some photos when they're all done.
I Already have a fleet of modern-era freight cars and some Conrail and NS units. All I need to do is take the Pennsy stuff of the layout and put the Conrail/NS equipment on. I can even throw Amtrak into the mix if I so choose. Fellow Pennsy modeller Dave Vollmer does exactly that on his layout.
Okay, there is one little flaw in this plan. My trackplan calls for four tracks; Conrail removed one track in 1981. Oh well, when faced with choosing between accurate for the Pennsy or accurate for Conrail/NS, I choose Pennsy.
I've already started repainting some of my Cherokee Foothills locomotives into Conrail blue. I will post some photos when they're all done.
Thursday, August 1, 2013
A Track Plan at Long Last
Well, after being distracted by rolling stock projects and other stuff, I figured it was time to get back to the actual layout. One thing that made my last layout successful was thoroughly planning out every detail. I designed Cherokee using Atlas free track planning software called Rightrack. Unfortunatly, after designing my last layout, my computer caught a virus and I had to format the hard drive. When I went to download a new copy of the program, I found Atlas discontinued the program.
In search of a new track planning program, I found XtrkCAD. As it turns out XtrkCAD is far more user-friendly than Rightrack and whole lot less cumbersome.
Here's the track plan so far:
What we have here is a section of the Pennsylvania Railroad main line from Altoona to Johnstown, PA. I've included Horeshoe Curve, the Gallitzin Tunnels, a short branch line to a coal mine as well as the towns of Gallitzin and Cassandra.
The the basic main lines are done. The yards, sidings and staging areas still need work. I guess now it's time to decide which structures to include and plan the sidings accordingly.
In search of a new track planning program, I found XtrkCAD. As it turns out XtrkCAD is far more user-friendly than Rightrack and whole lot less cumbersome.
Here's the track plan so far:
What we have here is a section of the Pennsylvania Railroad main line from Altoona to Johnstown, PA. I've included Horeshoe Curve, the Gallitzin Tunnels, a short branch line to a coal mine as well as the towns of Gallitzin and Cassandra.
The the basic main lines are done. The yards, sidings and staging areas still need work. I guess now it's time to decide which structures to include and plan the sidings accordingly.
Monday, July 29, 2013
More Rolling Stock Arrives
No, I'm not going to post every time a buy freight car. Heck, the would get tedious after a while. But I am sharing these three recent eBay scores to show off some of my weathering techniques.
As you can see it's always important to go heavy with the chalk. A car my look to decrepit before Dulcote but look just right afterwards.
Anyway, that's all I've got for tonight. I'm still working on the track plan and I have a few structure kits I'm working on as well.
Here's a "before" picture of the three cars:
See how pristine and shiny looking they are? How many real world freight cars look like that? Not very many. I start of weathering by brushing on a black wash made by adding a few drops of India Ink to a bottle of 70% rubbing alcohol. Once that dries I spray on a coat of Testors Dulcote.
After the Dulcote has dried thoroughly, I take some pastel chalks, grind them up and brush on the dust. I start off with a coat of white to fade the paint a bit. I follow that up with some brown for rust, a mixture of brown, black, white and yellow for dirt and black on the roof to simulate soot from steam engines.
After you apply chalk weathering you have to seal it with a second coat of Dulcote. Usually this makes about two thirds of the chalk vanish.
Chalks Before Dulcote:
Chalks After Dulcote:
Here's an "after" photo of the three freight cars:
And a better view of their rooves:
Subscribe to:
Posts (Atom)