Showing posts with label DCC. Show all posts

Friday, December 26, 2025

The Great Digitrax Decoder Die Off


After returning to model railroading after a long hiatus, I was frustrated to find a large number of my locomotives simply will not run. This includes my Kato L1 2-8-2, my brass I1sa 2-10-0, my Minitrix B6 and all my Norfolk Southern diesels. I can put them on the programming track, address them but then no response

The common denominator is that all the affected locomotives are equipped with Digitrax decoders, specifically DN136 or DZ136s. I'm at a loss as to what's happening here. The only thing I did was let them sit for a while. It's looking like I may have a lot of decoder replacement in my future!

Wednesday, November 28, 2018

Team Steam is Back!


I finally got around to getting two of my mainline steamers up and running again. For the past two years, my Kato/GHQ L1 has been sitting idle in the Altoona locomotive shop. The darn just didn't run right after conversion to DCC.  After a little detective work, I found the problem lay with the tender. Its wheels provide most of the power pickup and they weren't making good contact with the rails.

The solution turned out to be dead simple. I went to Hobby Lobby, bought some Pinewood Derby car weights and packed as many of them as humanly possible into the tender. And that was the ticket! The locomotive ran smooth as silk after that.


You may recall that a few months ago I ran my brass I1 into a turnout set the wrong way, shorted it out and cooked the decoder. I purchased a new decoder back in August and over the past few days have been working on installing it.

Now, as delivered, the locomotive's drivers pick up the right rail current and the tender wheels picked up the left. This arrangement was okay but not optimal. There were a handful of turnouts on my layout that were impassible obstacles for this loco. My solution was to swap out the stock tender trucks with Bachmann trucks, which draw current from all eight wheels. This would prove far easier said than done.

The tender chassis had to be modified to accommodate the new trucks.  For the forward trucks, I fired up my Dremmel and proceeded to cut two slits in the chassis. Believe me, taking power tools to a $400 brass locomotive is not for the faint of heart! I successfully cut said slits but in the process obliterated the screw holes for holding the shell on. What's worse, I cut right through the end of the chassis! Once that happened, I knew it was time to fight my Greek genes, go downstairs and take a break. After having some lunch and taking some time to cool down and think rationally, I arrived at a solution. I reinforced the front of the tender with a piece of styrene.

For the rear trucks, I decided cutting slits wasn't the way to go.  Instead, I opted to cut off the vertical tab on each truck contact. Using a pin vise, I enlarged the holes on each side of the bolster to accommodate the wires. This worked beautifully.  With that done, I soldered the wires to the truck contacts and the decoder.

The final hurdle was mounting the trucks. The mounting holes on the Bachmann trucks are considerably larger than those of the stock trucks. After scavenging the local hardware store for washers, I came up empty-handed. My solution was to take two small pieces of styrene and drill small holes in them. These act as retention plates for the trucks.

With the decoder installed, I put the loco on the tracks and it ran perfectly. It moved through the turnout that had once stopped it dead with total confidence. So, the effort paid off. That said, I would sooner endure a root canal without novocaine than do that again!


While we're on the subject of steam, Broadway Limited delivered their long-awaited T1 shortly before Thanksgiving. While not quite as good as their M1, it is a fine locomotive. In terms of steam, we sure have come a long way in the last five years.

Saturday, January 20, 2018

Looking Back...


It's 2018 and the layout is in the midst of its fifth year of construction. A lot has changed to say the least. It's hard to believe most of the layout is sceniced already. But there's still a ways to go.

Let's start with motive power. Five years ago, there wasn't a lot in the way of road specific power available. In terms of steam, all you had were the Minitrix K4, B6 and 2-10-0 (which needed some bashing to become an I1). All of them required a lot of tinkering to get them to run well. You also had the GHQ L1 conversion kit for the Kato Mikado. They weren't great, but unless you wanted to spend plutocrat money on brass, that was all you had. Of course Broadway Limited was taking preorders for their M1, but it appeared destined to be vaporware forever.

But then, in 2015, Bachmann came out with their K4 with DCC and sound. It was the first piece of road-specific PRR steam released since the 1970s. Of course, they did it right after I'd dropped a few Benjamins to have Max Magliaro remotor my Minitirx K4!

If that weren't enough, a few months after the Bachmann K4's debut, Broadway Limited finally delivered their long-awaited Centipede and M1 models. If that's not enough, they've announced a T1. I preordered one and hopefully I get it before my 3-year-old leaves for college. So in terms of motive power, we're getting there. What I'd really love to see are some H class 2-8-0s and maybe an E6 Atlantic.

Speaking of E6 Atlantics, one was produced way back in the early 1990s by Black River Locomotive works. According to Spookshow (link) only a few hundred were ever produced and in five years of modeling the Pennsy, I've yet to see one on eBay.

That's enough about motive power, now let's talk about DCC. When I started, I was using an MRC Tech 4 to run the layout. I kidded myself about using DC cab control to operate the layout. But then, one night, I had some friends over to run some trains and the shortcomings of this idea were laid bare. I bought an MRC Tech 6, which allows one to run both DCC and analog. Honestly I don't think I've run an analog locomotive on the layout since 2015!


Looking back at Horseshoe Curve, I have to say I'm not all that happy with how it turned out. Here's the deal, I had gotten the layout to the point of being operational back in February of 2014 and started on the scenery. But that summer, my wife said "honey, I'm pregnant!" Knowing that once the baby arrived, time for modeling would be nonexistent, I plowed full throttle into scenery. Through the fall of 2014 and into the winter of 2015, I spent every spare moment working on the layout. I wanted to at least have the curve finished before my son was born.

Ultimately, I fell short of this goal. And to top it off, the sense of "beat the clock" over-urgency caused the scenery to look a bit slapdash. I slowed down and took my time on the rest of the layout. But that only makes this section look even worse.  So, if you're wondering what I'm going to do when the layout is finished, I'll tell you: rip out and redo the scenery at the Curve. Specifically, the lake and the road. I may even remove these entirely, which brings me to my next point.

Through the eyes of 20/20 hindsight, I realize I made the center peninsula far too wide. While it gives amazing depths to both the Curve and Gallitzin, it makes them both really, really hard to access. This is especially true of the curve. There is an access hatch, but even still parts of the track are out of reach. This makes cleaning and/or rescuing stalled trains a very difficult proposition. So, I'm torn between redoing the scenery or simply removing the lake and road to create an aisle. Either way, this is a few years off.


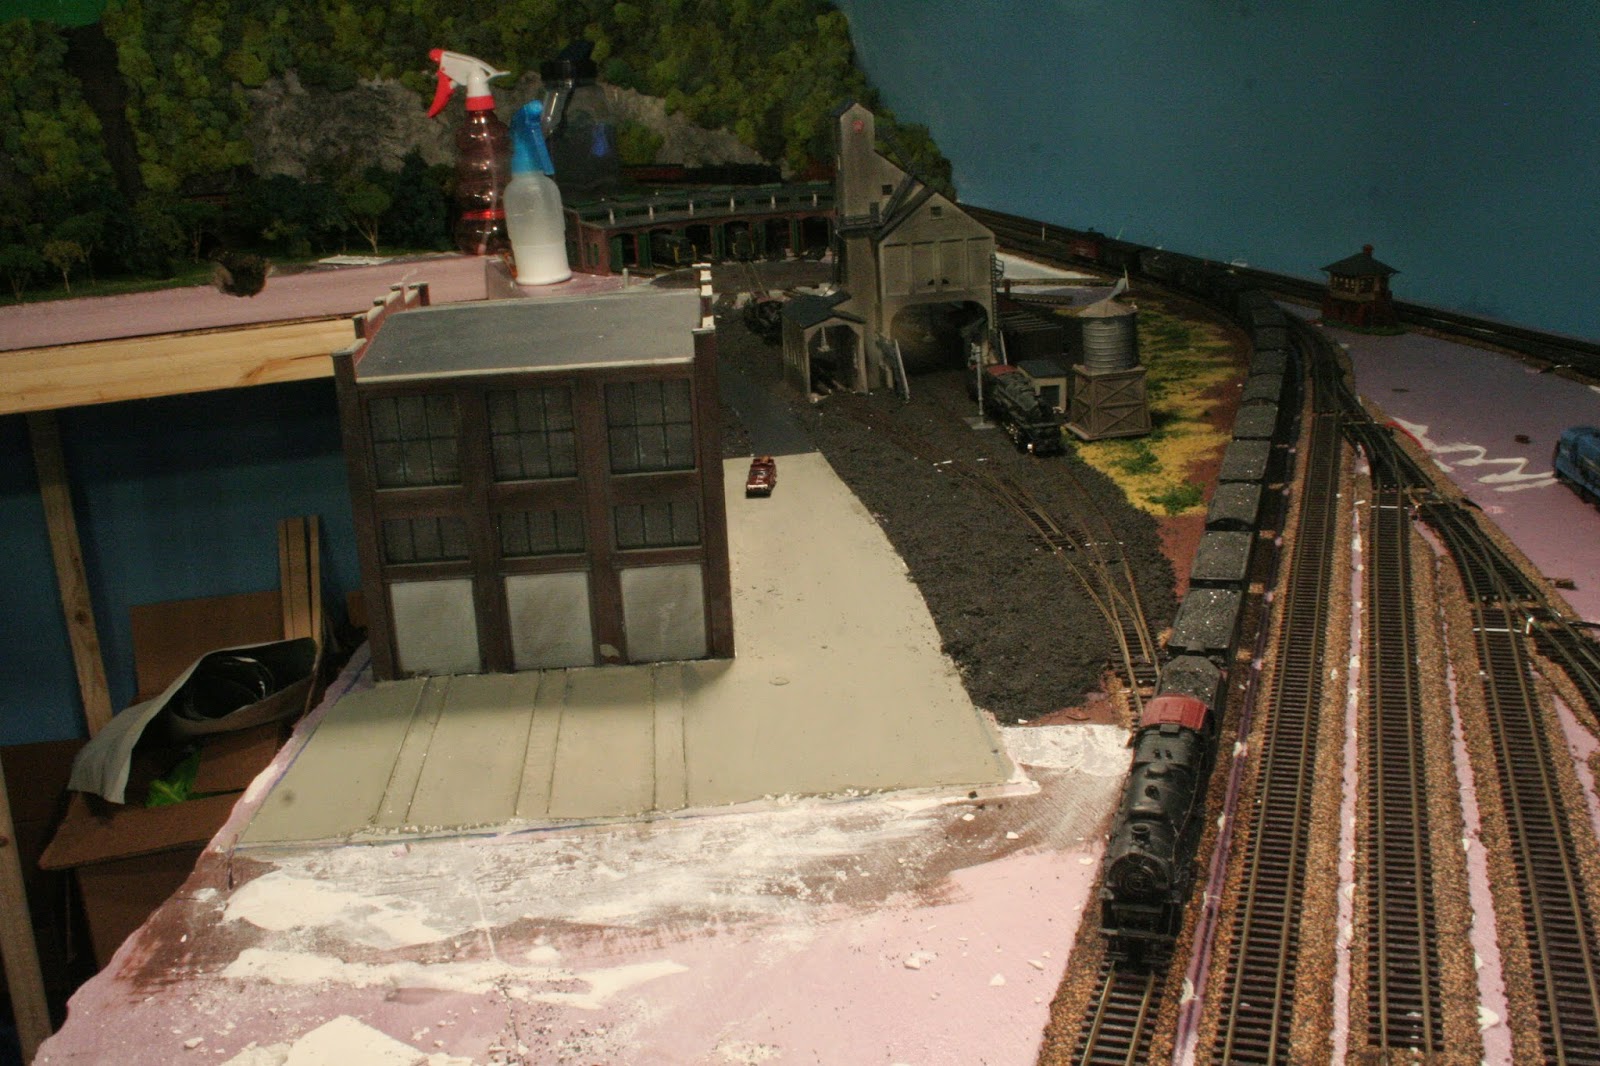
The Altoona Shop complex was another victim of my pre-baby modeling scramble. And the more I look at it, the less I like it. The real PRR Juniata Shop complex was (and still is) massive. As a result, I would probably need the entire train room to recreate it accurately. The whole thing looks really kluged in where it is. I think the shops ultimately belong inside the Altoona yard loop. And the cheap-looking Atlas turntable? Yeah, that has to go.

The space where the shops currently sit could be better used for a few more rail-served industries. There should be enough space there to keep a local crew busy for a while.

So yeah, a whole lot of blather. In fact, I'm kind of impressed you read all the way to the bottom. But, when you get this far into a layout, you start to realize what you like and don't like about it. The good news is there's a lot more of the former than the latter. The better news is the things that fall into the latter category are correctable. That's certainly good news as I aven't the time, money or energy to start over at this point.

Thursday, March 31, 2016

Started using JMRI

As you recall, about a year ago, I took the plunge and switched from analog DC cab control to DCC. I haven't looked back. The switch to DCC opened up a myriad of operational possibilities. During the past few days I've taken things even farther by interfacing the DCC system with a computer and using Java Model Railroad Interface or JMRI software to do a number of things.


The gizmo that makes this all possible is the Digitrax PR3Extra decoder programmer. It can be used a stand-alone decoder programmer or to allow your PC and DCC system to do the Vulcan mind meld. The latter is exactly what use it for.

What exactly does JMRI do? A whole lot things. It allows you to program decoders from your PC, allows you to use your PC or smart phone as a throttle, manage car routing during operating sessions, operate signals and manage your locomotive roster.  It can also display block occupancy provided the right hardware is hooked up to your command system. The possibilities are endless. However the system does have a bit of a steep learning curve and I'm still getting the hang of parts of it.


The feature I'm most excited about is Withrottle. This app, coupled with the JMRI software allows an tablet or smartphone to function as a DCC throttle. All that's required is a wireless router and PC, which everyone has anyway.  This means I don't have to spend a fortune on throttles in order to operate and thereby puts the goal of hosting my first operating session within reach.


Monday, December 21, 2015

Added a Programming Track


A separate programming track has been a long-overdue project since switching to DCC.  Before, every time I wanted to do something as simple as address a new decoder, I had to remove every other locomotive from the layout. Needless to say, that's kind of a pain.

This was a very simple project. I took the wires leading from my DCC system to the layout and routed them to a DPDT switch. I then ran one set of wire back to the layout and the other to the programming track. Not only can I switch between the two easily, but I can kill the power to the layout quickly if I have to. 

The track itself is nothing more than two pieces of Kato Unitrack that came with my Broadway Limited set.

Wednesday, December 16, 2015

About time I posted on here

Wow, over a month since I last posted any progress on the layout. Well, I certainly have a ton of reasons for my recent layout building inactivity. First and foremost, my wife and I hosted Thanksgiving so not only was I busy with getting the house ready, but I also wanted to keep the layout and train room neat and clean for visitors. After that, it was finals. In other words, layout was on the back burner.

Now that the semester is over, I've manged to take on a few long-overdue projects. First among them was moving the track lights around to better illuminate parts of Horseshoe Curve and Altoona.


I'm still fine-tuning things but the new setup seems more effective. Ultimately, I'd like to replace the CFL bulbs with LEDs, since the latter are dim-able and put the track lights on their own circuit. 

Another item I crossed off my to do list was installation of more Digitrax UP5 panels. I added an additional panel near the entrance to Johnstown yard and the other near the Gallitzin industries.


While I was at it, I also added a cup holder near Gallitzin too. After all, a stable place to set one's beer is always a must. Now, I am ultimately planning  to buy a UR90 panel, which will let me go wireless. So why the UP5s? Well, they are there as a backup. If for whatever reason, the wireless isn't working, I still have the panels at all the main switching areas and the layout can still be operated.

And speaking of DCC and operations, I decided it was time to acquire a few more throttles. I opted for the Digitrax UT4. Unlike the "Super Throttle" that came with my system. These feature only basic functions and can't program decoders.  But that's really all you need for operators anyhow. 


The last project I tackeled was getting one of the Gallitzin switching areas, glued down, wired up and operational.


This project required an handful kludges to get done. Foremost among them was covering up the short section of incline that brings the siding down from the main line. Normally, one would use plaster cloth for this task.However, I hadn't any on hand and didn't want to go out. For mountains, I usueally use paper towels dipped in plaster of Paris, but I was out of plaster mix too. Undaunted, I remembered something from elementary school art class and diluted some Elmer's glue. I dipped the paper towels in this mixture and let it dry over night. That was the ticket, the flex gaps in the riser were covered and I had a firm place to lay my track.

The next problem I ran into was I was out of cork roadbed. Since the one hobby shop in my area is never open when I'm off from work and I didn't ant to buy a whole case for a handful of sidings, I took a throwback to my early N Scale days. On my first two N Scale Layouts, the Table Rock diorama and the PR&Y, I fashioned my own roadbed from foam sheets sold at my local Michael's. I decided to do the same thing here. All told, it's the same amount of work as the cork stuff, and for a siding, it's more than adequate. 

It also turns out, I was out of Peco insulated rail joiners. However, I had a pack of Atlas Code 80 joiners. Good idea in theory, but in practice, not s much. Turns out the Atlas joiners are a tad too narrow for the Peco rail. So I had to spend a good bit of time gashing the joiners wider with an Exacto knife until they fit. 

So despite all the kludge jobs, I was able to reliably back my L1 down each siding without the slightest hiccup. With that result, I'm calling this project as success. I'm kind of excited to have more operating opportunities.


Tuesday, August 11, 2015

Finished Model Power's "The Sullivan's" Again


I bought another bunch of Model Power house kits at the last train show I attended. They'll help populate Gallitizin. Now, I've already built this kit once. But most houses in a given area are usually built to similar designs so I figured I could get away with repeating myself as long as I painted them different colors.

Anyway, assembly didn't exactly go smoothly this time around. First off, I decided to paint the walls Floquil "Coach Green," which is usually a big pain in the nuts to work with. It's quite watery and runny and as such, you have to slather on coat after coat to get it somewhat opaque. The result being the walls took nearly two days to dry thoroughly. 

This kit also comes with a bright red roof. Since this is a house in a small Pennsylvania town and not a pet-friendly budget motel, that had to go. So I used, you guessed it, Floquil "Grimy Black." I finished things off by painting the foundation Floquil "Concrete." The windows and shutters stayed in their stock colors s did the porch and chimneys.

Let's talk about the windows and shutters for a second, all 26 and 52 of them respectively. What a tedious slog these things are to put on, especially the shutters! In fact I damned near left them off and think I'll do just that on subsequent houses. Not only will it speed assembly but also differentiate them further.

Things really started getting hair when I started assembling the walls. This house is essentially two perpendicular rectangles. You glue one to the other, slightly off center. The roof of one rectangle has a cutout to accommodate the roof of the other. Being an idiot, I glued the one rectangle in the wrong spot relative to the cutout and had to pull the whole thing apart, leaving a nice bit of glue schmootz all over the wall. 

All in all, this house didn't turn out too bad, Wicked Witch of the West color scheme aside.


In other news, I got my two Pennsy geeps equiped with DCC decoders. Being older models, they required TCS "CN GP" decoders. These are basically two small PC boards interconnected with wires. They're actually kind of a pain to install, requiring complete dis-assembly of the mechanism. No, not terrible, but kind of a pain. But that said, it is nice to have another key piece of road power back. That just leaves my L1 mike and my PAs and the entire PRR road fleet is DCC.

Saturday, August 1, 2015

Oh Brave New (To Me Anyway) World


As threatened, I got the last UP5 panel hooked up and installed in Johnstown. Now I actually have a degree of walk around operation and I'm pretty damned excited about it. Let me tell you, when it comes to DCC, I have seen the light. I can't believe I seriously thought I would have operating sessions using cab control! And speaking of realistic operations, I got a little taste of that last night too.

H16-44 #8807 brings the Broadway Limited into Johnstown

When I rigged up the new system, I hastily pulled all locos off the layout, leaving their consists behind. The main lines resembled a scene out of Atlas Shrugged. So before I could run some trains I had to clear the tracks. H16-44 number 8807 was assigned to the task. At first I had he hook up to a consist sitting on the outer main at Johnstown and back it onto the inner main and then pull it into the yard. Next, it was a move up to Cassandra to fetch another stranded cut of cars and bring them back to Johnstown yard as well. The final move of the night was a run up to Gallitzin to retrieve the Broadway Limited consist. This will probably be the little FM's only shot at pulling the Broadway.

To be able to follow my train around the layout and take full advantage of my yards and staging tracks was awesome. I am very much looking forward to full operating sessions


Thursday, July 30, 2015

Major DCC Upgrade


Well, after getting bitten by the DCC bug a few months ago, I've finally gotten enough of my locomotive fleet upgraded to warrant upgrading my system. After much hemming and hawing, I opted for Digitrax Super Empire Builder starter set. The set features a five-amp command station/booster a throttle and a UP5 Jack for tethered operation. The system can also be upgraded to support wireless operation as well. The system supports 22 addresses and 22 throttles, more than I'll ever likely need on this layout.


In addition to the starter set, I also ordered up an additional pair of UP5 jacks and have begun the process of installing them around the layout. This is part of Digirtax' "Loconet" system. All of the various components are connected using Loconet cables, which are really nothing more than 6-wire telephone cables with six-pin plugs. They're quite easy and cheap to make.  

I've installed one UP5 Panel at the main control panel, one in Altoona and plan to install one in Johnstown. I plan to install at list one more at Gallitzin.

I've yet to actually run any trains as I'm just getting the feel of the new system. It seems to have a bit of a learning curve. But I'm sure I'll figure it out.

Sunday, June 21, 2015

DCC Doings and Train Show Haul


This past weekend was a productive one. On Saturday, my wife, son and I attend a train show up in Charlotte. Among the items in the haul were five decoders, enabling me to upgrade my K4, I1sa, H16-44, Trainmaster and C628. With DCC installed in these locos, I've been running DCC on one loop, DC on the other and running five trains at once. 

More good news is my little one seemed to really be intrigued by the O-Gauge layout they had set up at the show. Hopefully I got him hooked early.

Also in the haul was about eight freight cars and two Bowser N5 cabin cars.. Combine that with the four Broadway Limited PRR H32 covered hoppers I received for Father's Day and I've got enough to run several good-sized trains.

If that weren't enough, I also picked up some structure kits and heavyweight passenger cars.


Sunday, May 10, 2015

Times, they are a changin'

Wow, more than a month since my last post. I suppose you're wondering where I've been all this time. Well, I haven't had much time for the layout as of late. For one thing, it's finally summer in my neck of the woods and whatever spare time I have, I prefer to spend outside. On top of that, school was particularly hard this semester and I was a bit overloaded with final exams and course work.

But the biggest reason for my lack of layout activity is my wife and I welcomed our first child in late March.

Me and our family's newest addition. Cuteness factor off the scales.
So, with a new baby, my time for the layout has been virtually non-existent. I've been lucky to run the trains a handful of times since we got home from the hospital. Not that I'm complaining mind you. I love my little guy and treasure every minute I get to spend with him.

Now, I did manage to get some work done on the layout just before the little guy arrived. First and foremost, I did a whole bunch of work at the Altoona shop complex.


First and foremost, I laid the track down to the backshop. The track is a mixture of Peco C55 and Atlas C80. The code 80 was used for the track embedded in pavement and for the turnouts. I don't intend to actually run anything on that track so I didn't have to be as careful laying it.

The next thing I did was mask out the roads with Woodland Scenics paving tape and set about paving them with plaster of Paris. I have to tell you, embedding track in pavement is a pain in the ass to put it mildly. I painted the roads black and the area around the backshop with Woodland Scenics concrete pigment.

I used WS "fine cinders" ballast as a ground cover around the shop area. Between the shop and the main line, I used some WS fine turf. This time however, I used burnt grass as the primary color with green patches to give the area an industrial look.


Just after the baby arrived, I finally got my Broadway Limited DC Master control box and only five months after the originally-scheduled delivery date! I origionally pre-ordered this because it would allow me to make use of the sound effects on the BLI M1a I pre-ordered back in April of 2014. It's a bit of a moot point now that I have the MRC Tech 6, which will allow me to run the engine on DCC. Now if BLI would just get off their duffs and make the engine, which is now going to be at least eight months past its original delivery date. Seriusly, I wonder if BLI is run by Orren Boyle.   They aught to change their name to Associated Models (if you don't know why that's funny, read Atlas Shrugged).

Thursday, March 12, 2015

On the Road to DCC

After, having the guys over to run trains a few weeks ago and having nothing but problems, namely overloading the power supply, I decided the layout had outgrown the MRC Tech 4. The next day, I began shopping for a suitable replacement. But then I got to thinking that if I was going to buy a new power supply, I may as well take the plunge and upgrade to DCC. After all, DCC would make formal operating sessions much easier than cab control.

The one big hang-up I had about buying a DCC system was that I have very few decoder-equipped engines. Most of my fleet will however accept drop in decoders, but those cost money and conversion would be a long slog. In addition I do have a lot of older engines that like to run. What I wanted was a dual-mode system of sorts. A more powerful power supply that would give me walk-around control and allow me to run both DC and DCC engines. And that's when I discovered the MRC Tech 6 system.


This system is exactly what I wanted.I can switch between functioning as a regular DC power pack or a full-out DCC system. It also comes with a 6-amp power supply, which should allow me to run multiple long trains headed by multiple locomotives on the same loop without breaking a sweat. 


Now, the Tech 4 hasn't been retired just yet. See, in DC mode, the Tech 6 functions only as one cab. I need the the Tech 4 for the other. That said, with it only running one loop instead of two, the Tech 4 should work better. However, I gather as I start equipping my fleet with decoders, it will be getting less and less use.