Sunday, June 7, 2015

Earthworks Complete at Horseshoe Curve


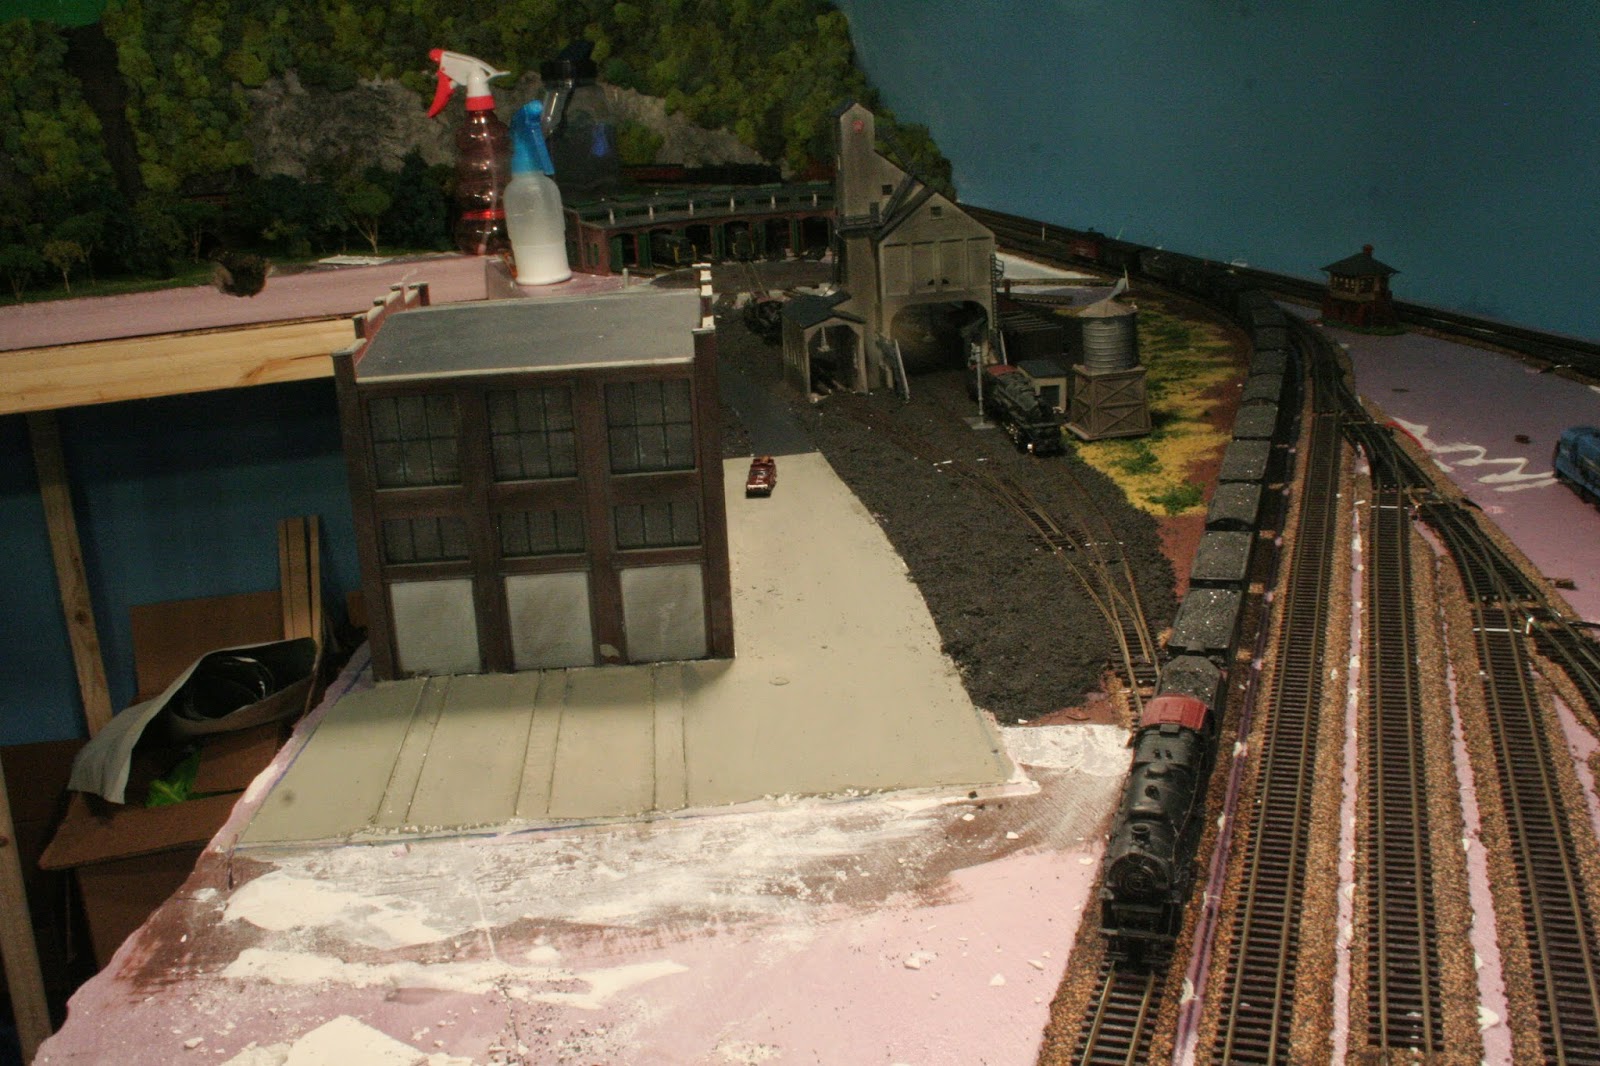
I found myself faced with an increasingly-rare bit of free time today and decided to tackle the last of the major earthworks at Horseshoe Curve. Essentially I used a hot knife to cut valley into the styrofoam and used plaster-socked paper towels to attain the proper depths. When that was finished, I tacked the hillside in front of Kittanning Point station.

All that remains at the Curve is roads, painting the base coat, turf and foreground trees. Wait, did I say "all?" That's a lot. Who knows when I'll actually get to it but I hope it's not too long.

Tuesday, May 26, 2015

Upgraded my Mike


One of my best-running steamers has always been my L1 2-8-2. It's a Kato mechanism with a GHQ pewter shell. Unfortunately one of its few shortcomings was pulling power. Even with the heavy pewter shell, 13 cars was all I could ever get this thing to pull up the 2% grades on my layout. Thankfully Kato made a replacement driver set with traction tires. I purchased one of eBay and installed it tonight. Now the locomotive can easily pull 18 cars. installation was dead simple. All I had to do was remove the bottom plate, remove one drive axle and install the replacement.

Thursday, May 21, 2015

Sunday, May 10, 2015

Times, they are a changin'

Wow, more than a month since my last post. I suppose you're wondering where I've been all this time. Well, I haven't had much time for the layout as of late. For one thing, it's finally summer in my neck of the woods and whatever spare time I have, I prefer to spend outside. On top of that, school was particularly hard this semester and I was a bit overloaded with final exams and course work.

But the biggest reason for my lack of layout activity is my wife and I welcomed our first child in late March.

Me and our family's newest addition. Cuteness factor off the scales.
So, with a new baby, my time for the layout has been virtually non-existent. I've been lucky to run the trains a handful of times since we got home from the hospital. Not that I'm complaining mind you. I love my little guy and treasure every minute I get to spend with him.

Now, I did manage to get some work done on the layout just before the little guy arrived. First and foremost, I did a whole bunch of work at the Altoona shop complex.


First and foremost, I laid the track down to the backshop. The track is a mixture of Peco C55 and Atlas C80. The code 80 was used for the track embedded in pavement and for the turnouts. I don't intend to actually run anything on that track so I didn't have to be as careful laying it.

The next thing I did was mask out the roads with Woodland Scenics paving tape and set about paving them with plaster of Paris. I have to tell you, embedding track in pavement is a pain in the ass to put it mildly. I painted the roads black and the area around the backshop with Woodland Scenics concrete pigment.

I used WS "fine cinders" ballast as a ground cover around the shop area. Between the shop and the main line, I used some WS fine turf. This time however, I used burnt grass as the primary color with green patches to give the area an industrial look.


Just after the baby arrived, I finally got my Broadway Limited DC Master control box and only five months after the originally-scheduled delivery date! I origionally pre-ordered this because it would allow me to make use of the sound effects on the BLI M1a I pre-ordered back in April of 2014. It's a bit of a moot point now that I have the MRC Tech 6, which will allow me to run the engine on DCC. Now if BLI would just get off their duffs and make the engine, which is now going to be at least eight months past its original delivery date. Seriusly, I wonder if BLI is run by Orren Boyle.   They aught to change their name to Associated Models (if you don't know why that's funny, read Atlas Shrugged).

Friday, March 20, 2015

Work at the Altoona Shop Complex


It's been over a month since I posted any progress on the layout. Well, there simply hasn't been  much to post. I've been very busy with school for one thing. That, and spring has definitely sprung down here. The weather is getting warmer and the days are getting longer. As usual my enthusiasm for model railroading tends to wane a bit around this time of year.

Over the past few nights I have made some progress at the Altoona Shop complex. As you can see from the above photos, I put down some Woodland Scenics paving tape to mark out all the paved areas. Next I spread some black WS ballast as a ground cover and ballast for the yard tracks. I also drilled holes and installed lights in some of the buildings.

I decided I didn't like the backshop where it was behind the coaling tower and moved it to where you see in the photo. In it's old location, the tracks from the turntable would have to make crazy-sharp turns to reach the shop and it would have looked really stupid.

So anyway, this may be it for a while on the layout progress. I have ordered up the first batch of DCC decoders and plan on converted the Norfolk Southern fleet over the course of the next few months. So I'll be keeping you updated on that. And who knows? By mid summer when its 90 degrees outside with 110% humiditiy, spending time in an air-conditioned train room may start to seem appealing again.

A Visit to Hendersonville

For my birthday weekend, my wife and I took a ride up to Hendersonville, NC to see the Apple Valley Railroad Club's HO scale layout. I'd heard about the layout from a few of my modeler friends and also saw the write up it got in Model Railroader. The layout is located in the Hendersonville Depot and is open to the public. (Link).


While in Hendersonville, we also got word the the French Broad e"N"pire NTrack club had their layout open to visit as well. 


After watching trains andtaking pictures for a while. The crew asked me if I wanted to run and handed me a DCC throttle. So here I am, the man behind the curtain.


Thursday, March 12, 2015

On the Road to DCC

After, having the guys over to run trains a few weeks ago and having nothing but problems, namely overloading the power supply, I decided the layout had outgrown the MRC Tech 4. The next day, I began shopping for a suitable replacement. But then I got to thinking that if I was going to buy a new power supply, I may as well take the plunge and upgrade to DCC. After all, DCC would make formal operating sessions much easier than cab control.

The one big hang-up I had about buying a DCC system was that I have very few decoder-equipped engines. Most of my fleet will however accept drop in decoders, but those cost money and conversion would be a long slog. In addition I do have a lot of older engines that like to run. What I wanted was a dual-mode system of sorts. A more powerful power supply that would give me walk-around control and allow me to run both DC and DCC engines. And that's when I discovered the MRC Tech 6 system.


This system is exactly what I wanted.I can switch between functioning as a regular DC power pack or a full-out DCC system. It also comes with a 6-amp power supply, which should allow me to run multiple long trains headed by multiple locomotives on the same loop without breaking a sweat. 


Now, the Tech 4 hasn't been retired just yet. See, in DC mode, the Tech 6 functions only as one cab. I need the the Tech 4 for the other. That said, with it only running one loop instead of two, the Tech 4 should work better. However, I gather as I start equipping my fleet with decoders, it will be getting less and less use.